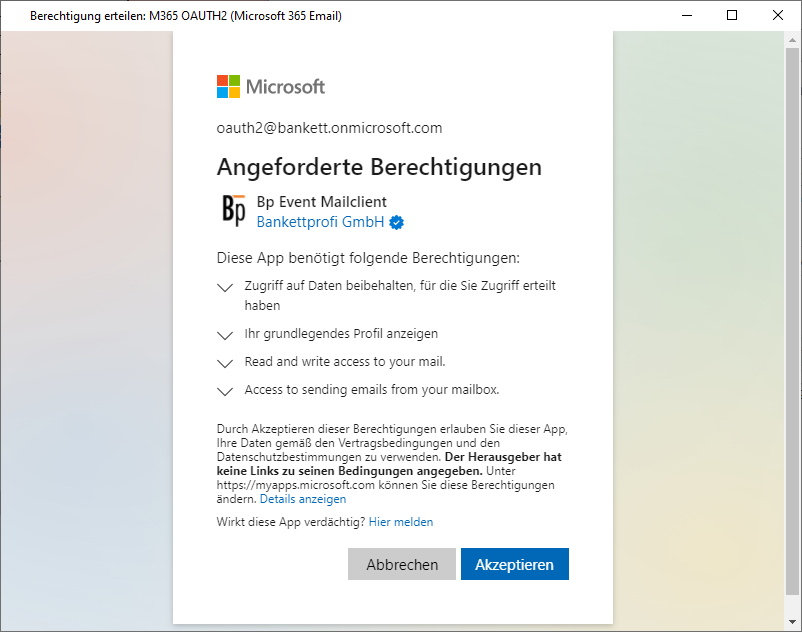
Create a new Sync. Server

  1. Go to the Administration Administration tab in the function bar and select Administration Settings > Schnittstellen Interfaces > KalenderSync Synchronisation.
  2. neu Add a new Sync. Server with the type OAUTH2.
  3. Enter a unique name, we recommend "M365 OAUTH2".
  4. Select Microsoft 365 Email as server type.
  5. Tick the box Use default settings.
  6. Speichern Schliessen Save your input by clicking on the icon in the top left-hand corner of the input window.

Store the new Sync. Server in the email settings

  1. Go to the Administration Administration tab in the function bar and select Administration Settings > > E MailEmails.
  2. To add the OAuth 2.0 Sync. Server to the Microsoft 365 email server, select the sync server you have just created from the picklist.
  3. save Save your input by clicking on the icon in the top left-hand corner of the input window.

Important: After setting up OAuth 2.0 authentication, the email accounts from Bp Event still need to be connected to Microsoft 365.

  • Hits: 306

Important: After setting up OAuth 2.0 authentication, the email accounts from Bp Event still need to be connected to Microsoft 365.

  1. Go to the Administration Administration tab in the function bar and select Benutzerexpand Users > Benutzer User Groups > suche Search.
  2. Open the user group you want.
  3. Go to the e Mail Konto Email account tab.
  4. To connect the email account stored there with Microsoft, click on Connect in the Password/Connect column. The standard web browser will open with a login screen.
  5. Authenticate yourself in the Microsoft dialogue with the same email account as in Bp Event.
  6. Following successful authentication, the following authorisations must be accepted:

Office Berechtigungen akzeptieren

  1. After confirming the authorisations, you will be automatically logged out of the web browser.
  2. Confirm the message in BP Event to grant the rights.
  3. Confirm the message "The authorisation code could be determined" by clicking OK.
  4. Carry out the test for the email configuration. The setup is now complete.
  • Hits: 324

Important: After setting up OAuth 2.0 authentication, the email accounts from Bp Event still need to be connected to Microsoft 365.

  1. Go to the Administration Administration tab in the function bar and select Benutzerexpand Users > Benutzer User > suche Search.
  2. Open the user you want.
  3. Go to the e Mail Konto Email account tab.
  4. To connect the email account with Microsoft 365, the password must be editable.

Ask the user to log in to Bp Event again.

  1. Go to the icon optionen Options tab in the function bar and select e Mail Konto Change email password. A Microsoft dialogue will open in the standard web browser for authentication.
  2. Authenticate yourself in the Microsoft dialogue with the same email account as in Bp Event.
  3. Following successful authentication, the following authorisations must be accepted:

Office Berechtigungen akzeptieren

  1. You will be automatically logged out of the web browser.
  2. Confirm the granting of rights in Bp Event.
  3. Confirm the message "The authorisation code could be determined" by clicking OK.
  4. Carry out the test for a successful configuration. The setup is now complete.
  • Hits: 100
  1. Go to the Administration  Administration tab in the function bar and select Administrationexpand Settings > Administration  General settings > E Mail Emails.
  2. Click on neu New to add an email server.
  3. Enter a unique, self-explanatory Name for the email server.
  4. Enter an OAuth 2.0 Sync Server.
    Note: If you use the OAuth procedure for authentication on the email server, a corresponding sync server must be set up.
  5. Enter the IP address / DNS name of the server dedicated to sending emails in the Outgoing mail server field.
    Note: Enter individual ports in IP:Port format (e.g. 127.0.0.1:25).
  6. Select SMTP encryption if necessary:
    a) Automatic (TLS)
    b) none
    c) SSL
  7. Tick SMTP authentication if required.
  8. Tick Send via server if emails must be sent from the IP address of the server in your system environment (exceptional case).
    Note: By default, emails are sent from the IP address of the Bp Event Client.
  9. Select a Type (receipt log)
    a) POP 3
    The emails are downloaded from the email server and can be deleted from the server immediately. If the emails are downloaded to another device, it is not possible to determine which emails have already been read or edited.
    b) IMAP
    The emails remain on the email server and are only synchronised. Emails that have been read or edited are also displayed on other devices. Individual mailbox folders can also be synchronised.
    c) IMAP Download
    Emails are downloaded from the email server using the IMAP protocol (similar to POP3).
  10. Activate the SSL/TLS encryption if the incoming mail server supports this.
  11. Set an individual Recycle bin folder (only possible with IMAP).
  12. Set an individual Spam folder (only possible with IMAP).
  13. Set a Sent folder if emails sent to the email server are to be displayed (only possible with IMAP).
  14. To delete emails directly from the server after loading, tick Delete emails after loading (only possible with POP 3).
  15. Specify the number of days after which the emails should be deleted in the Delete after column (only possible with POP 3).
  16. Speichern Save the settings.
  • Hits: 316
  1. Go to the Administration  Administration tab in the function bar and select Administrationexpand Settings > Administration  General settings > E Mail Emails.
  2. Tick Hide email in function bar if you do not want to use the Bp Event email functionality.
    Example: Bp Event users only send emails from Bp Event.
  3. Below the email servers, click on the button Schedule automatic mail download. Enter the desired retrieval series and save the setting.
    Note: Email retrieval is set for every 15 minutes by default.
  4. To display the outgoing emails of a user (and their groups) in another tab, tick Show sent-mail folder in mailbox.
  5. To prevent indiviual manual retrieval of emails when an email retrieval series has been set, tick Forbid manual email refresh.
  6. Note: Tick the Allow reloading email option only after consultation with the Bp Event Hotline or IT. This option allows users to reload emails that have already been downloaded.
  7. Tick Lock after sending to prevent emails that have already been sent from being changed (revision security).
  8. Speichern Save the settings.
  • Hits: 299